Welcome to this late-game layout and optimization BALLxPIT Base Layout Guide – Passive Loadout for Late Game. This breakdown shows how to structure your base for maximum passive income, faster upgrades, and long-term efficiency. Whether you’re preparing for extended high-round sessions or trying to stabilise your economy earlier, this layout covers every stage from early placement to fully optimised late game.
BALLxPIT Base Layout Guide – Passive Loadout for Late Game
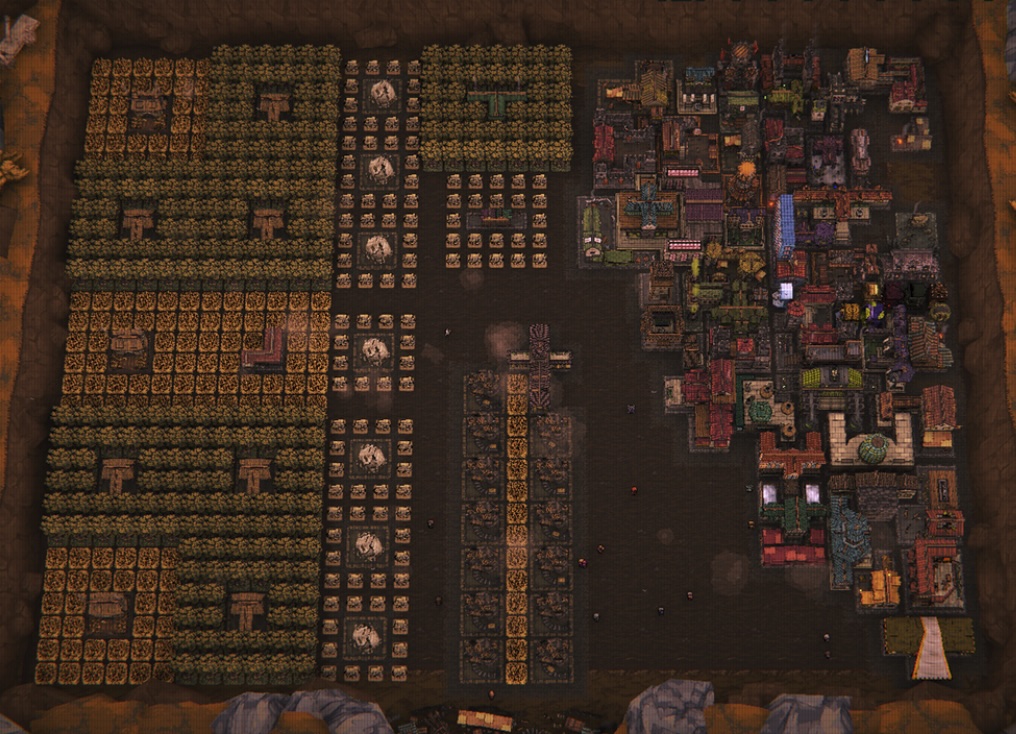
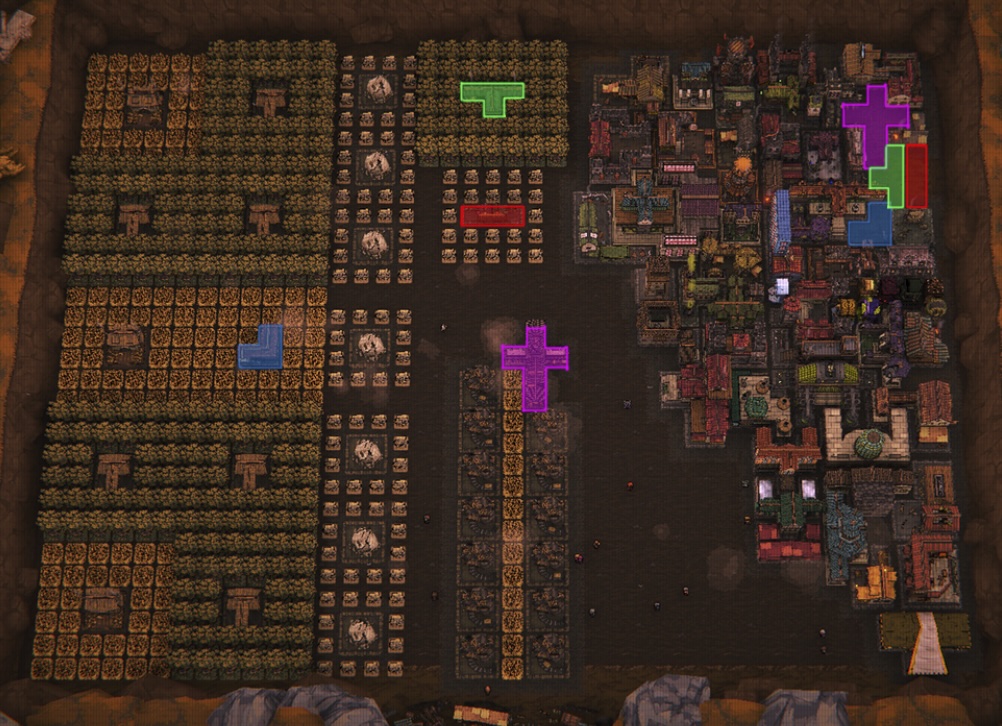
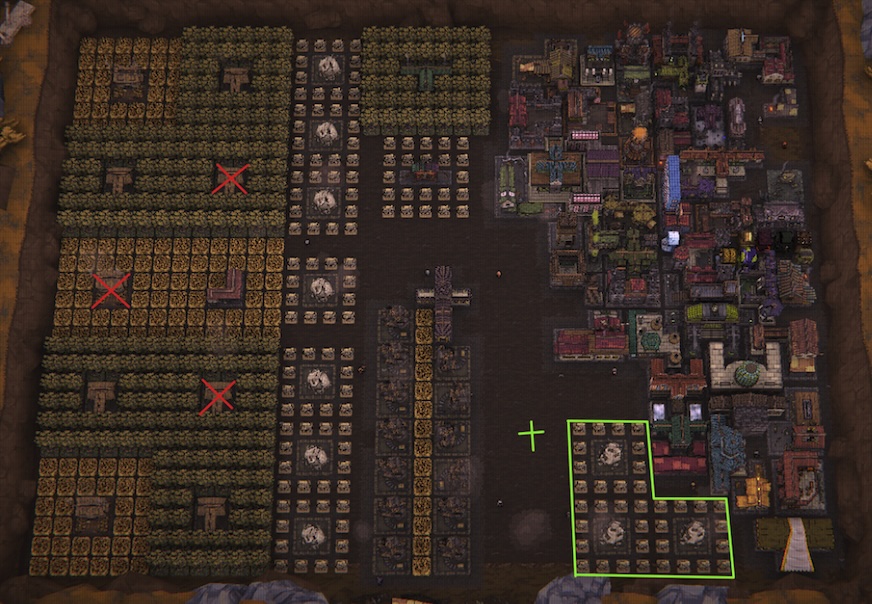
You don’t need to delete anything when adjusting your resource balance. If you prefer leaning toward Wheat, Wood, or Stone at any point, simply reassign your workers to whichever nodes you want to focus on. This lets you shift production without rebuilding your layout.
Veteran’s Hut
Make sure your entire housing block sits inside the hut’s XP radius. This keeps every home benefiting from the bonus and speeds up worker growth as your settlement expands.
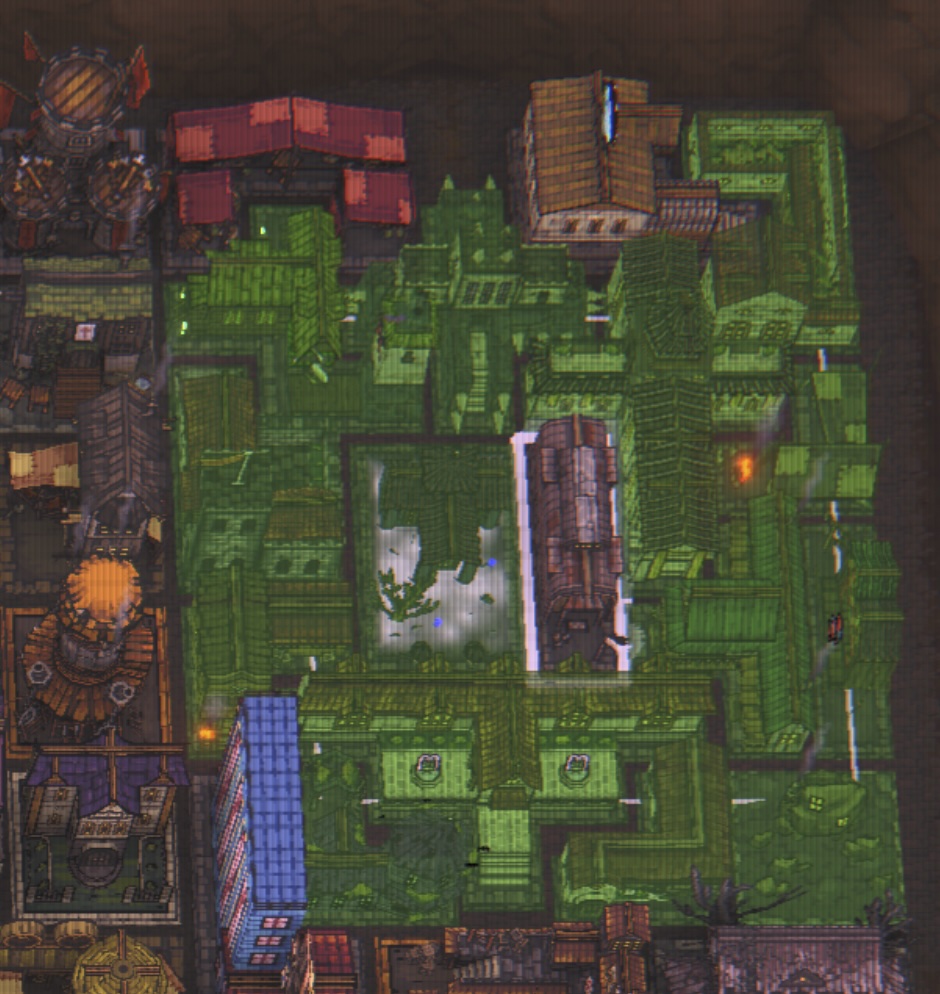
: If the coverage area doesn’t reach as far as shown in the example above, the building simply needs more levels.
Captain’s Quarters
Position it so every building that provides stat bonuses falls within its radius. This ensures all of those boosts are applied consistently.
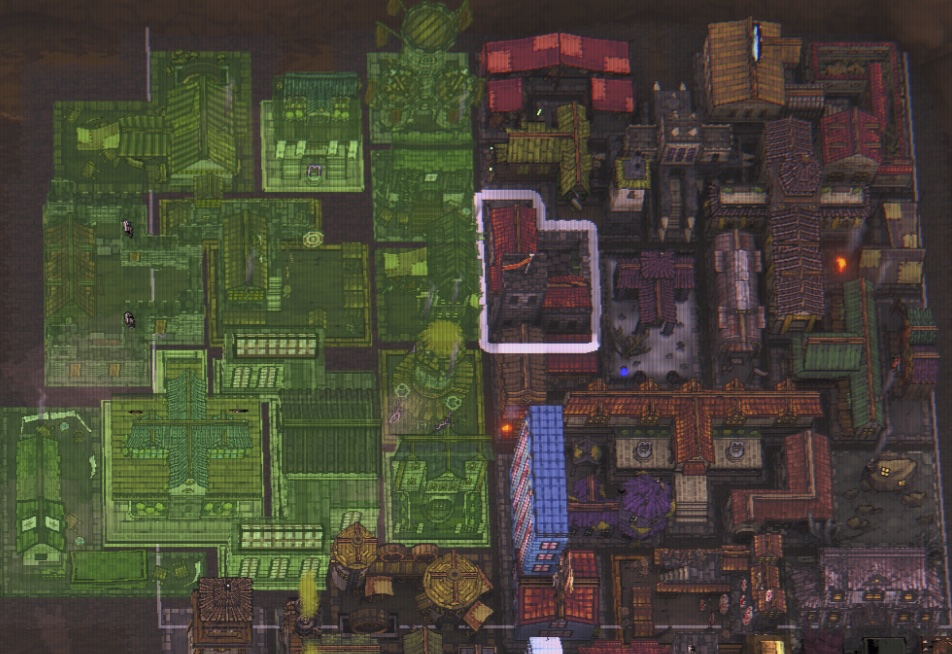
If the coverage area in your game is smaller than what’s shown above, the building just needs additional leveling.
Extra Gold
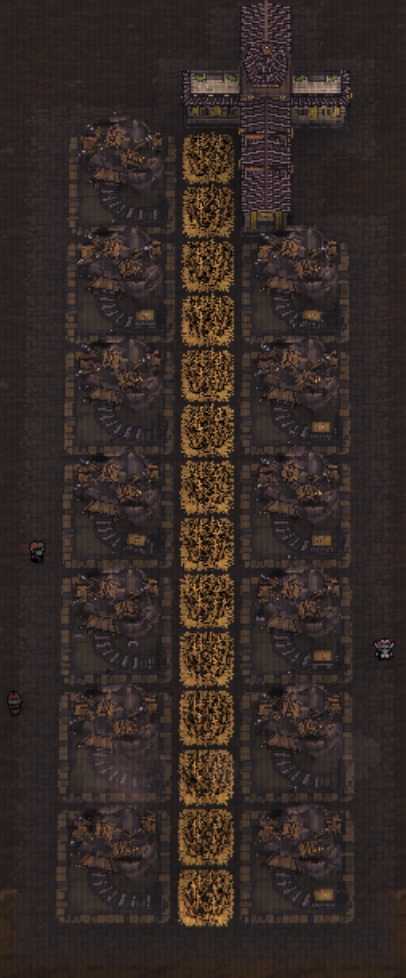
If you’re planning to stay in a run for a while, doing a dedicated gold cycle between rounds can significantly boost your income. Keep every Gold Mine staffed, then reposition the Monastery beside them for the full production bonus. With this setup, you’ll typically pull in around 3.4–3.5k gold per run.
The Wheat fields aren’t required here—they just add a small trickle of extra resources, so you can include them if you like.
Upgrading Buildings
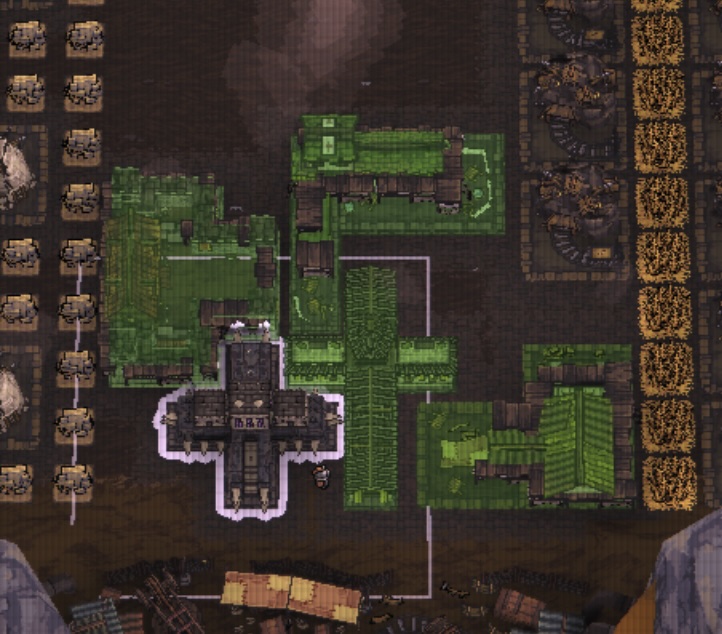
Late-game upgrades can become extremely bounce-heavy, so it helps to cluster the Iron Fortress and the Monastery around whatever structure you’re upgrading. You may need to shift a few nearby buildings to make room, but once everything is in range, upgrade costs drop sharply.
With this setup, you can keep your Gold Mine workers in place and still push high-tier upgrades efficiently.
Bonus: Early Game Tips
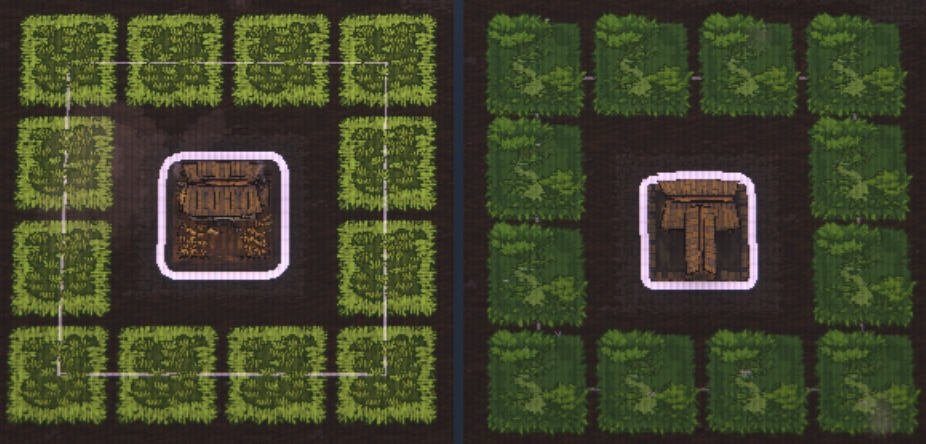
If you want stronger early production, arrange your Wood and Wheat buildings in the pattern shown below. This layout makes room for four additional resource nodes, giving you a small but meaningful boost right from the start.
Bonus: Mass Gold
As your runs accumulate, the Market’s sell multiplier becomes extremely valuable. To capitalise on it, hold Shift and use the x10k option to sell a large batch of each resource in one go. This lets you cash out at the highest possible rate and generate a massive gold spike.
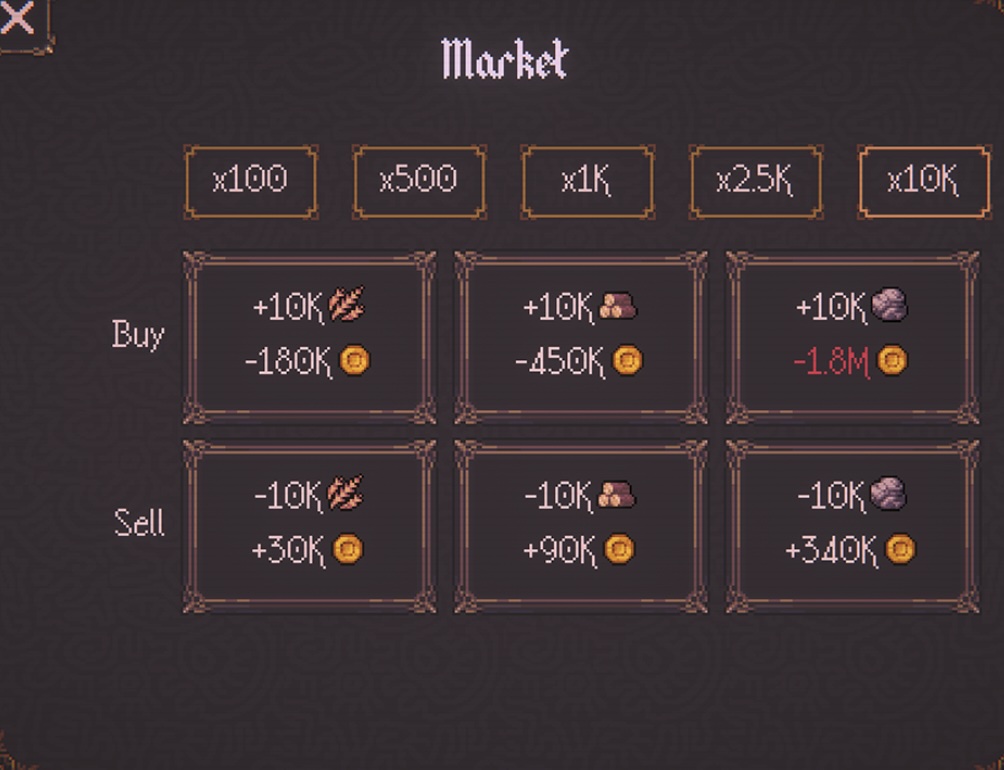
At maximum multiplier, Wheat sells for 4 each, Wood for 10, and Stone for 40. Once the rates hit those values, they won’t increase any further, so that’s the ideal time to unload your stock. Selling everything at peak price can earn you roughly 540,000 gold in a single trade cycle.
That’s everything I’ve tested so far. This layout has been the most reliable for long runs, smooth upgrades, and steady resource flow, but the game is always evolving—and so are the builds we come up with.
If you discover a placement, trick, or optimization that outperforms what’s shown here, feel free to share it. I’m always happy to update the guide with better solutions so everyone can benefit from them.
Thanks for reading, and good luck pushing your next high-round run.
Orignal Created by NikoD45.