Duelists of Eden may look like a typical card-grid-fighting game, but with the gorgeous character design and best decks to play keep players entertained for hours of gameplay.
Here, players can easily access the available Duelists of Eden Character Guides, which include Starter Decks, team compositions, . Some tips for each characters and decks.
Duelists of Eden Character Guides & Starter Decks
Saffron
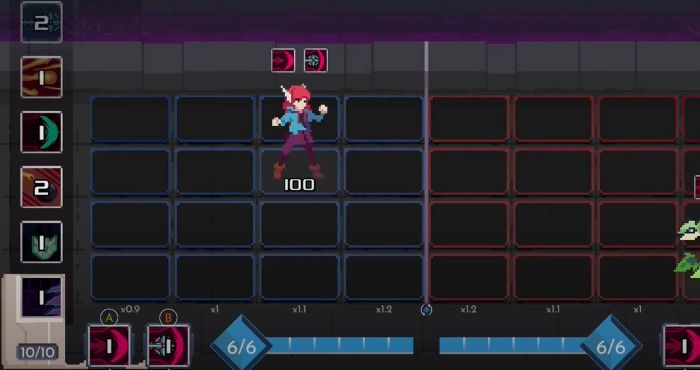
The Vanilla Ice Cream, The Ryu, the Ol’ Reliable of Duelists of Eden, Saffron offers a simple but effective weapon and an area of effect attack that rewards pinpoint accuracy. A great character to learn hit-confirming (following up a successful hit with a combo), experiment with odd spells and will have an answer in most situations. She struggles against structures as her weapons deal small damage, so be prepared to carry some front-line area of effect to clear out turrets and bombs.
Weapon: Sparkler fires a 2 dmg shot that lasts until it hits a target or leaves the field. This is a great way to keep your front guarded behind an attack, and is fast enough to let you combo into certain spells.
Sub-weapon: Spartex fires a blast in the shape of a cross 4 tiles away. The center tile will hit faster than the others, and deals 2 dmg. The residual hits are 1 dmg. Generally, the best way to use this is to catch them in off-angles and to cover areas that can’t be covered with your current hand or Sparkler.
Starter deck tips
- Starter combos: Align/Kinetic Wave>Triple Barrel, Step Slash>Fire Breath, Fire Breath>move back>Thunder
Weapon only combos: (Must be 5 tiles away): Sparkler>Spartex>Sparkler>Spartex Loop, Sparkler>move forward>Sparkler>move forward loops, (5 or more tiles away): Sparkler>move forward>Sparkler>Spartex; add more sparkler>move forward loops beforehand if farther away - Fire breath will clear front line structures if they try to place them there. You can also align structures to teleport them to a more manageable location
- If you are stuck in root or a combo, using sparkler when you can do things again could potentially lead into a trade, giving you some time to escape to a safer position
 Selicy
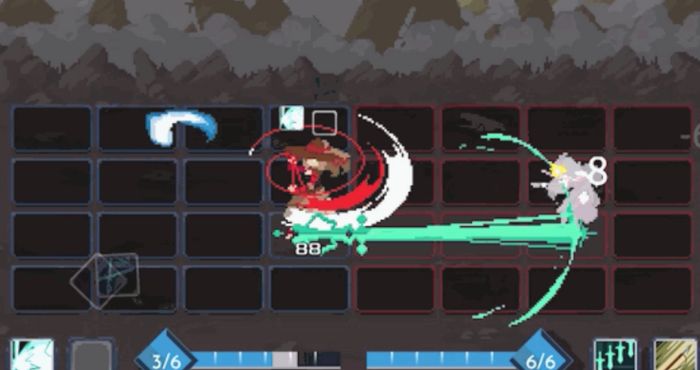
Awkward at first, but with time and practice Selicy can be one of the most fearsome characters you can use and have to fight in the game. Her ability to turn any front-range or melee spell into a threat anywhere on the screen at any time will put anyone on the backfoot and respect the tile coverage. She is one of the best users of dash spell techniques and has some for herself, which when mastered can lead to incredibly flashy and damaging combos.
Weapon: Fairfrozen is a dash spell that sends Selicy forward 3 tiles and she attacks in a 3-tile horizontal radius centered on her. While only dealing 2 dmg, you may cast spells during the middle part of this animation, letting her do extra damage when she goes in.
Sub-weapon: Hail blade drops an ice sword 4 tiles away. It can deal 2 non-stunning dmg if it hits an opponent or if they walk into it. If Selicy touches the same tile it’s on, usually by using her weapon or a dash spell, The sword will be swung around in a 3×3 circle and deal 4 dmg to anything hit by it.
Starter deck tips
- If you really want to get into Selicy, it is worth looking into this in-depth guide about Dash Spell Techniques here: Dash Spell Guide Duelists of Eden
- Starter combos: Step Slash>Push Slash, Step Slash>Push Lance>Crossfire, Step Slash>Missiletoe>Fairfrozen>etc., Fairfrozen>Frost Slash
- Weapon only combo: [opponent must be in their last column]: Fairfrozen>move forward>hailblade (Not a true combo but worth knowing about to knowledge check people)
- As long as Selicy reaches a hailblade she will activate it. So this means you can activate several hailblades in one dash as long as you set it up beforehand! Go wild!
- Remember that you can dodge at any point you use a dash spell like fairfrozen so if you commit to a dash and they look like they are ready for it, you can still dodge to mitigate some damage
Hazel
This lover of buildings and structures also happens to take chunks of life whenever she bonks someone with her large wrench. Hazel can play an aggressive turtle style, waiting for the perfect moment, building an army of turrets, and pulling the opponent to the front or invading their space to give them a smack.
Weapon: Block summons a 1 HP block in front of you. If Hazel ever bonks a block, it will gain 4 HP and turn into a gun turret that slowly loses health as it periodically shoots bullets. If it bonks an enemy or non-block structure, they’ll take 5 dmg.
Sub-weapon: Deviate is a fast wave attack that will push anything caught in it one tile up and deal 1 dmg.
Starter deck Tips
- Starter Combos: Bomb Toss>Shotgun the bomb, Bomb>Pull the bomb>Block/Shotgun, Deviate>Warp Rays, Pull>Shotgun>Minigun
- Placing a block on a mine or trap on the field will detonate it
- You can Deviate structures into the row the player is on, or a structure to a player is on for a unsuspecting attack
Deviate is also a very fast attack so keep it in mind if you need to take just 1 or 2 HP off the opponent to win the match
Terra
Terra is the Break archetype specialist of the DoE, with a weapon that can crack tiles and a subweapon that can drag opponents into a trap. If you like the idea of sectioning off part of the playing field, or even locking them down to a single tile, Terra might be worth playing.
Weapon: Terraform hits 4 tiles away and deals 2 dmg. The tile it hits becomes cracked. if you fire Terraform onto any cracked or broken tile, it will also attack the panel to the left and right of it
Sub-weapon: Dark Matter places a 3 HP structure 4 tiles ahead. Its HP will drain after a period of time and when it reaches 0 it will explode and drag a target into the tile it once occupied. It will also deal 2 dmg.
Starter deck Tips
- Combos: Terraform>Earthquake>move back>Terraform>Thunder, Push Slash>Backstab>Ion Cannon>Earthquake, Ion Cannon/Terraform>Earthquake>Flurry
- Use Terraform to fill the gaps in your cracked tile pattern
- Keep in mind that if dark matter explodes on a cracked tile, it does not break but becomes restored
- If Ion Cannon is in your starting hand at the beginning of the game, cast it immediately at the start as it targets their location and very fast. They will be forced to dodge, or try to move away or more likely you will catch them
Shiso
Shiso employs crafty tactics to force situations onto his opponents with his subweapon, and can employ deadly weapon loops when he has ammo
Weapon: Slip Gun: If you have no ammo, you fire Blank which deals 2 damage to the two tiles in front of you. If you do have ammo, you spend one to fire a pushing laser attack (similar to air rifle)
Sub-weapon: Aftershock: Fires a delayed shot that deals 4 damage. If it hits something, you gain 1 Ammo that Slip Gun can use
Starter deck Tips
- Combos: Align>Triple Barrel, Aftershock>Align>etc, Align>Thunder, Shadow Shift>Kunai>Slip Gun>Thunder
- Weapon combo: (With Ammo): Aftershock>Slip Gun>Slip Gun
- You can farm ammo from hitting structures, such as your own Beam Crystal
Violette
Violette is a careful position based character that rewards pinpoint accuracy. She has the ability to move characters with her weapon into ideal spots to get maximum damage. Although she struggles with certain structures such as Beam Crystals without a spell to counter it, Violette more than makes up for it when she can find the hit.
Weapon: Misericorde slashes the 3 tiles in front of her, with the first two dealing 1 dmg. However, the third, farthest tile hit is a sweetspot and will deal 3 dmg to someone hit on that tile and be moved back one tile
Sub-weapon: Charm fires a projectile that deals 1 dmg and pulls the target in
Starter deck Tips
- Combos: Align>move forward>Whirl>Misericorde>Thunder, Push Slash>Backstab>Whirl>Misericorde, Charm x4>Shotgun, Align>Backstab>Misericorde, Push Slash>Thunder
- Weapon combos: Charm will combo into itself
- Whirl has a lot of recovery, so you have to be careful when you fire it off. If it’s your last card, consider just manually shuffling then go for a miracle play
Reva
Reva is a close range fighter who can lunge into the front column fully invincible. Control the stage with Ricoshield, catch enemies off guard and instantly change your positioning and score some melee hits! However, she has no ways to enter the enemy territory on her own so you have to balance the melee spells and the dash spells you’ll have in your deck. Also one of the best synergizers with shield based tactics and cards as she can restore the shield bar with her weapon.
Weapon: Ricoshield throws out a boomerang-like projectile that slides to the end of the screen and wraps back around from the top. Anything it hits is dealt 2 dmg. Catch the returning shield to restore your shield by 6 pointsl.
Sub-weapon: Shield Bash grants you invincibility after a short delay, and moves you forward to your front column. A tri-blast one tile in front of you appears and deals 1×3 dmg.
Starter deck Tips
Starter Combos: Shield Bash>Kinetic Wave>etc, Step Slash>Missiletow>Shield Throw/Hyper Beam,
Weapon Combo: Shield Bash>Ricoshield
You can restore your shield to full fairly easily so don’t be afraid to block attacks
Chiretta
Chiretta excels at kinetic wave-esque combos and controlling columns with her weapon. Probably has some of the best spammable weapons in the game, and there is a combo loop you can learn. Has trouble with people who camp in the back column so attacks that can target that area is a must.
Weapon: Hew puts out a 3 tile tall attack 3 tiles away that deals 2 dmg. There is a sweetspot on the bottom hitbox of the attack that will deal an extra 1 dmg and move the target one tile up.
Sub-weapon: Sewture attacks in a progressive wave with a range of 3 tiles forward. Very similar to the kinetic wave spell.
Starter deck Tips
- Starter combos: Push Slash>Backstab>Hew>Hew, place Mine>Sewture, Backstab>Whirl, Step Slash>Missiletow>Thunder
- Weapon only combos: Hew(sweetspot)>move up>Hew(sweetspot)x2, (One tile away from opponent)Sewture>move forward, then up>Hew(sweetspot)
- If placed on the top row, Bomb Toss can block the 1 tile movement up of Hew, so you can loop Hews indefinitely until the bomb explodes
Gunner
Gunner holds an eclectic package with a laser weapon that gets stronger the more it’s used, and a melee attack that blows Gunner to the back. A great ranged user that doesn’t lack in melee coverage if you can wield his tools
Weapon: Charge Beam fires a near-instant laser that deals 1 damage. When used again, it deals 2 damage. Finally, on firing for the third time, a yellow, 4 damage laser is fired that pushes Gunner one tile back and puts a flame on the target’s tile.
Sub-weapon: Cherry bomb fires a small cone in front of Gunner and pushes him to his back column. Leaves a flame on anything it hits
Starter deck Tips
- Starter combos: Ember/Charge Beam [3]/Cherry bomb/Meteors [2nd hit]>Combust, Step Blaze>Combust>Salamander (enemy must be in the flames)
- Weapon combos: Charge Beam>Cherry Bomb, Cherry Bomb>Charge Beam
To produce a lot of flames, use Step Blaze and then Brushfire to cover two rows. Cover the rest with Firewall and Ember. - Capitalize with Salamander
Shopkeeper
The big baddie herself, while she can’t lock you in a prison of exploding crystals, a mine that can start giant combos is also just as threatening. Has a powerful kit that controls and restricts movement but has no front range threats – thankfully her kit encourages you to take front range threats to combo with her weapon.
Weapon: Tax Return places a mine for tiles away and any target that moves into it gets dealt 2 dmg and is pulled to the front column
Sub-Weapon: Gravitas fires in a diamond 4 files away. A target is moved into the center of the four hitboxes. If there are multiple targets, who is chosen to move to the center gets a little complicated.
Starter deck Tips
- Starter combos: Push Slash>Backstab, Align>Tax Return>Kinetic wave>etc, Bow Snipe>Gravitas
- Weapon Combos: Tax return>Gravitas
To get the most out of gravitas, you place a tax return/claw trap/mine at the center before firing gravitas - Generally, placing tax return on the back columns will force players to move closer, which puts them in range of your melee-range spells
Harissa
A new wanderer of Eden, Harissa employs teleport tactics to jump onto any part of the screen, finding hits and escaping scenarios that no other character is capable of doing. Her weapons are hard to use, but with the right pilot and deck it will look like the character has no such weakness.
Weapon: Primer is a 3 tile-tall slash that pulls any target hit by it all the way to the front, deals 2 dmg
Subweapon: Retracer teleports Harissa to the pad where it was last placed (it’s first location is where Harissa stands at the start of the game). Then, 3 missiles are fired 4 tiles away in a 3 tile-tall pattern, similar to how primer is arranged.
Starter deck Tips
- Starter Combos: Pull>Primer>move forward>Kinetic Wave, Step Slash>Primer>Kinetic Wave>etc, Push Slash>Backstab, Step Lance>Whirl
- The teleport pad from Retracer can be placed on the opponent’s tiles!
Primer can pull structures all the way to your own back column, making turret strategies nigh-useless against Harissa
Dreadwyrm
Hailing from Maiden & Spell, Dreadwyrm Heir brings her explosive bullet hell gameplay to DoE, keeping the screen full of swipes and lasers.
Weapon: Claw Swipe fires two projectiles above and below Dreadwyrm, with the top sword firing first. They each deal 2 dmg
Subweapon: Garnet Flare preps two row-long lasers that fire after a short delay. each deal 2 dmg, and you are actionable right after prepping the lasers
Related Content